
Successful Science Fair Projects
By Lynne Bleeker
(Science teacher, science fair organizer and judge)
A successful science fair project does not have to be expensive or even
terribly time-consuming. However, it does require some planning and
careful thought. Projects become frustrating to students, parents and
teachers when they are left to the last minute and thus don’t have the
chance to be as good as they possibly can. You can’t rush good
science!

A Science Fair Project display usually asks that you include certain
sections. Your particular science fair rules and guidelines may use
slightly different words to describe them, but be sure you address each of
them as you go through your project and then again as you write it up.
Sections of a Science Fair Project
Title

Ideally the title of your project should be catchy, an
“interest-grabber,” but it should also describe the project well
enough that people reading your report can quickly figure out what you
were studying. You will want to write your Title and Background sections
AFTER you have come up with a good question to study.
Background or Purpose
The background section is where you include information that you
already know about your subject and/or you tell your project readers why
you chose the project you did. What were you hoping to find out from the
project?

The Question (Or Selecting Your Subject)
Probably the most difficult part of a science fair project is coming up
with a good subject to research. I suggest to my students that they:
A. think about WHAT INTERESTS them.
B. think of a TESTABLE QUESTION about the subject.
If you are doing a project about something that interests you, you will
likely enjoy the research more and stick with it long enough to get some
good data. Remember, you are being a scientist. Scientists go to work each
day because they are interested in what they are studying and because they
are curious to know the answers to the questions they are researching.
If you are working to ANSWER A QUESTION, you will be doing real
research.
(Often students tell me that their parents have suggested doing something
such as “volcanoes” or “tornadoes.” It is possible to
build cute models of
these things, but it is pretty hard to come up with questions about them that
are testable with materials available to the average person and in the time
frame between when the science fair project is assigned and when it is due!)
Another problem occurs when students need special equipment to test a question.
For example, it might be interesting to find out if television commercials really
are louder than regular programming … but how would you test that without a
decible-meter?

Some of the best science fair projects I have seen have also been the
simplest. For example, I had students whose parents bought
“off-brands” of cereal. They wondered if those brands were really
any different from the name brands. They bought 3 or 4 different brands of
the same type of cereal and asked permission to test them with the whole
class. They had their peers evaluate them for taste, appearance, and
sogginess in milk after 1 minute. They also did a cost comparison.
They got a lot of interesting data! (I won’t tell you what they found
out in case you want to do something similar!) Other students who like
sports have done experiments with the equipment for their sport: Do new
tennis balls bounce higher than old ones? Do basketballs that are fully
inflated bounce better than flatter ones? These projects just require some
tennis balls or basketballs, some volunteer “bouncers” and a meter
tape or meter stick!
There are many good sources for science fair project questions. The
Neuroscience For Kids Web Site has some neuroscience-related questions
that might spark your interest. Projects involving food – tasting,
smelling etc – can be very simple to set up yet also very interesting.
“Can blindfolded people taste the difference between …?” You can
also get lots of ideas from science trade books, such as Janice Van
Cleave’s books (“Biology for Every Kid” etc). If you browse
through these books at a store or library, they may give you some ideas
for a project of your own.

Project Guidelines
Be sure to carefully read the project guidelines for your particular
science fair.
Rules vary greatly from fair to fair in what is allowed, both for safety and
ethical/animal use considerations. Obviously, experiments should not involve
illegal substances or involve clearly preventable danger to you or your research
subjects.
Some situations may require clarification from your teacher and/or
parents. For
example, suppose you were doing an experiment on the effects of caffeine (or
chocolate) on concentration or reflexes. Think about the possible consequences!
You would need to get permission before providing large amounts of high-caffeine
soda pop. Some science fairs discourage the use of food in experiments because of
food allergies. Again, check with your science fair guidebook or your teacher,
and be sure you clearly communicate to your (human) research subjects what you
will be asking them to consume so they can tell you if they have allergies.

Some science fairs allow experiments with live animals and others
don’t. For example, one classic experiment (found in most older
science fair project books) involves changing the temperature of fish
tank water and seeing what it does to the respiration rate (breathing) of
goldfish. In some places around the country, that experiment would not be
allowed at all. In others, you would need a special permission form
guaranteeing that you will take good care of the animal. In other places,
they don’t yet have such restrictions. Again, use common sense. I once
had students do a very clever experiment to see if their hamster or their
cat could learn to go through a maze more quickly. This experiment,
though it had animal subjects, obviously involved no chance of harming the
cat or the hamster so I gave them permission to do it. Generally you are
safest if your experiments involve plants or insects, and both types of
organisms can lead to some fascinating studies! If you REALLY want to do
an experiment with your pet, be prepared to explain what information you
are hoping to gain from the experiment and how you will ensure the safety
of the animal.
Prediction or Hypothesis

As soon as you come up with a testable question, you will probably
instantly have a hypothesis (prediction) about what the results will be
from your testing. (Isn’t the human brain an amazing thing?!) It’s
a good idea to write this down before starting, because it may change as
you go about your experimenting.
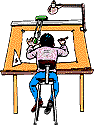
Materials and Methods
Once you have come up with a question that you can actually test with
materials at your disposal, you need to figure out how to set up the
tests. If you will have a survey for your participants to fill out, get
that written up and duplicated. If you will need a chart to write down
your test results, get it made. If you take the time to make it look nice
with a straight-edge, you can include the actual chart or survey
instrument in your project write-up. This really impresses the judges!

Let your teacher or science fair coordinator know what your question is
and how you plan to go about testing it. They will likely have some good
suggestions to save you lots of time and trouble. Once you have their
go-ahead, then make a list of your materials, gather them up and GET
STARTED! If you are really doing science, you will probably find that some
things don’t go quite as you had predicted they would. You will have
to modify your research methods or even your original question.
You may have to add more materials to your list. My students often get
discouraged by this, but actually it is a good thing. This is how science
really works!
Keep good notes of the things you have tried and plan to include even
the “didn’t-works” and “mess-ups” in your project
report. Be sure to try your experiment several times to be sure you have
enough data to make a logical conclusion. If you tell me that one brand of
cereal gets soggier in milk but you’ve only tried each cereal in one
cup of milk, I would suspect that maybe it was a fluke; you need lots of
“trials” (generally at least 3; the more, the better) for
believable data. Remember, too, that you want to keep all of the
experimental factors (variables) the same except the one you are testing.
In the cereal experiment, it wouldn’t be fair to all of the cereals if
you left one brand in milk for one minute and tried the others after two
minutes or something like that. Again, GET STARTED EARLY on carrying out
your project. You can’t still be doing the experiment the day before
the project is due and expect to have a first-class write-up!
In science fair projects as in life, “a picture is worth a thousand
words.” Plan to take pictures of the materials you used and of the
experiment as it is being carried out. If you get started early, you will
have time to have the pictures developed and include them as part of your
report. (Or if you are lucky and your school has cameras that will take
pictures and put them right into the computer, you will have time to learn
how to do that and print them out for your report.)
Results or Data
The results section is where you tell your reader the actual numbers
(or other data) that you got as you were doing the experiment. (In the
tennis ball experiment, this would be a table with the different brands of
balls and the actual heights each of them bounced on each trial.) You
might also include a graph, if your data lends itself to it. But you do
not tell your interpretation of the data – that’s for the last
section.
Conclusion
In the conclusion you finally get to tell your readers what you found
out from the experiment, or how you interpret your data. Students often
like to use this section to expand upon how much they liked doing the
experiment (and how wise the teacher was to require such a good
assignment!) or how much they learned from it … but really this section
should be focused on what you learned about your original question and
hypothesis. For example, DID cheaper cereals get soggier in milk
faster?
The Display
Project displays tend to be another source of great frustration to
students, teachers and parents … but they don’t have to be! Again,
what you need to do is PLAN AHEAD and then THINK OF YOUR AUDIENCE.
Remember that they weren’t there when you did the experiment, so what
seems obvious to you will not be obvious to them unless you make it
extremely clear.

Check to see if your science fair has any special rules to guide your
display. For example, are there rules about the size of your display?
Ideally, choose a display board that is cardboard and a
“tri-fold,” meaning that it folds into a middle and two side
sections. This shape is the most stable and will stand up in the science
fair display. These boards can be ordered from supply companies and are
also usually available at stores like Office Depot. Check and see if your
school has some from last year that can be re-used. This is good for the
environment and for your pocketbook! I strongly advise against the
flimsier posterboard, which tends to fall down easily and irritates
teachers and judges. Also avoid wood backboards, which are VERY difficult
to transport!
Once you have written or typed up all of the above sections, be sure
you have TITLES for each section that are large and legible (I’d
suggest 24 point or so on the computer). That way if people have questions
about some part of your project, they can go right to the section they
need to answer their question. Arrange the sections of the report on the
board in a way that is attractive and also logical. The purpose and
hypothesis should be easy to see right away. An art teacher can give you
some good suggestions about how to use paper of different colors to draw
attention to parts of the report and make it look terrific!
Other Science Fair Web Sites
Copyright © 1996-2013, Eric H. Chudler All Rights
Reserved.


Post a Comment